I fell in love with a lot of culinary-related things while living in Brazil. Black beans, pressure cooking, limonada, mangoes, and churrasco to name a few. While I already loved both sweetened condensed milk and dulce de leche, I discovered new ways of using both of them in Brazil. If you’re not familiar with dulce de leche, it’s a thick, caramel-y sauce used heavily in many South and Central American kitchens. Traditional caramel is made by cooking sugar (and usually butter) over high heat and adding cream at the end. Dulce de Leche is made by slow cooking the dairy and sugar together until it’s caramelized and brown. While many people traditionally make it by simmering a sealed can of sweetened condensed milk in water on the stove top, or placing the whole can in a pressure cooker, another easy method for making dulce de leche at home is to simply cook sweetened condensed milk in the oven until dark and caramelized. This oven method is very easy and extremely hands-off. The resulting dulce de leche can be used in a variety of recipes, such as on cakes and cupcakes, drizzled over cheesecake or waffles, or used as a dip for fruit. It’s SO good!
Ingredients and Equipment
- Sweetened condensed milk – you’ll use just a regular can from the baking aisle.
- Shallow Baking Dish – I usually use a pie place, but you may want to use another similar-sized dish, keeping in mind that it needs to fit inside a larger dish to use as a water bath. A loaf pan would also work.
- Larger Dish – the pan that contains your sweetened condensed milk needs to be placed into a larger dish.
- Foil – you’ll use foil to cover your dish before baking.
Instructions
- Preheat oven to 400 degrees.
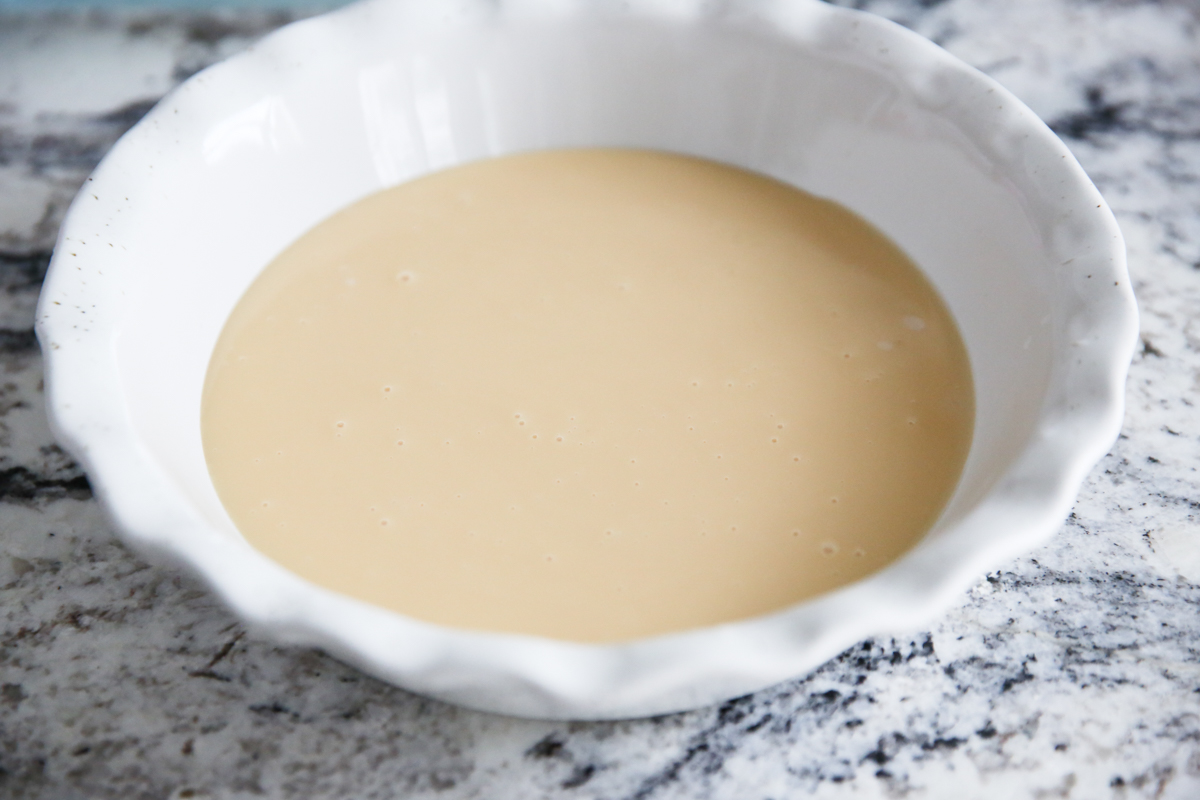
- Pour your can of sweetened condensed milk into your shallow baking dish.
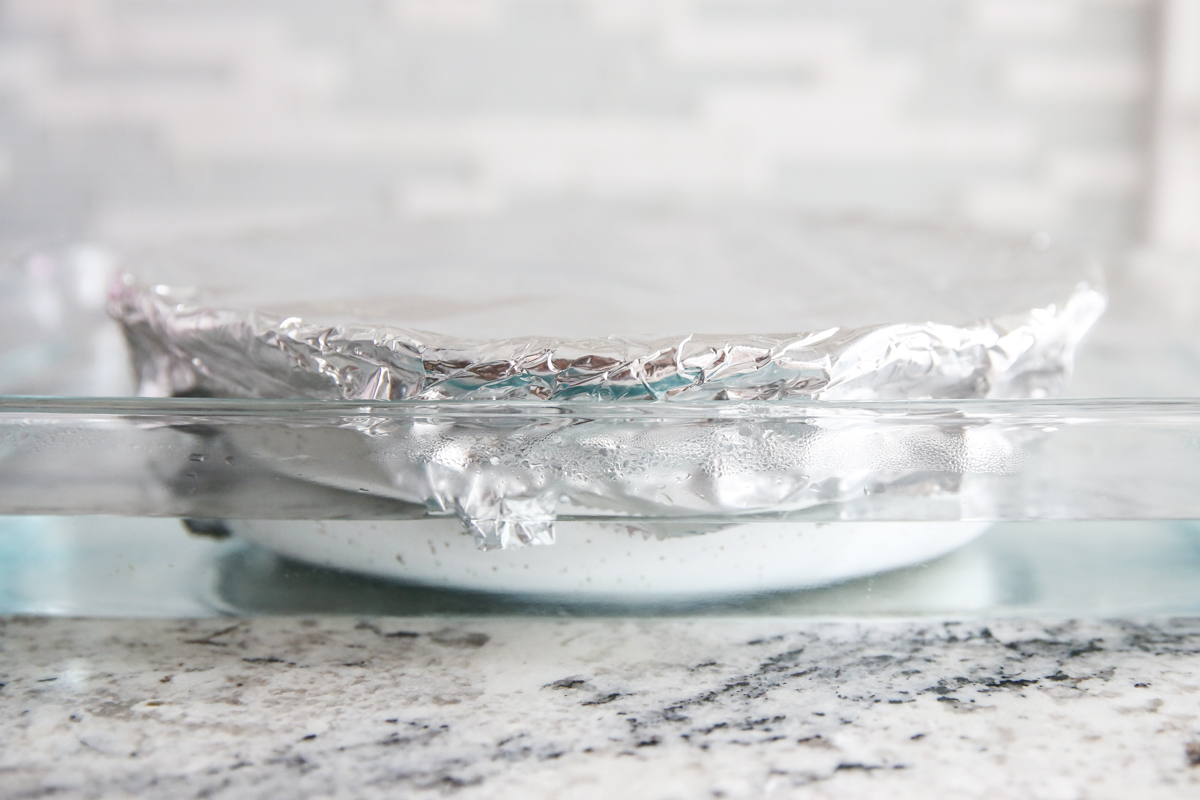
- Cover dish tightly with Foil.
- Place the covered dish inside a larger dish and set in oven rack.
- Carefully pour hot water into the larger dish so it reaches at least half way up the outside edges of your covered dish.
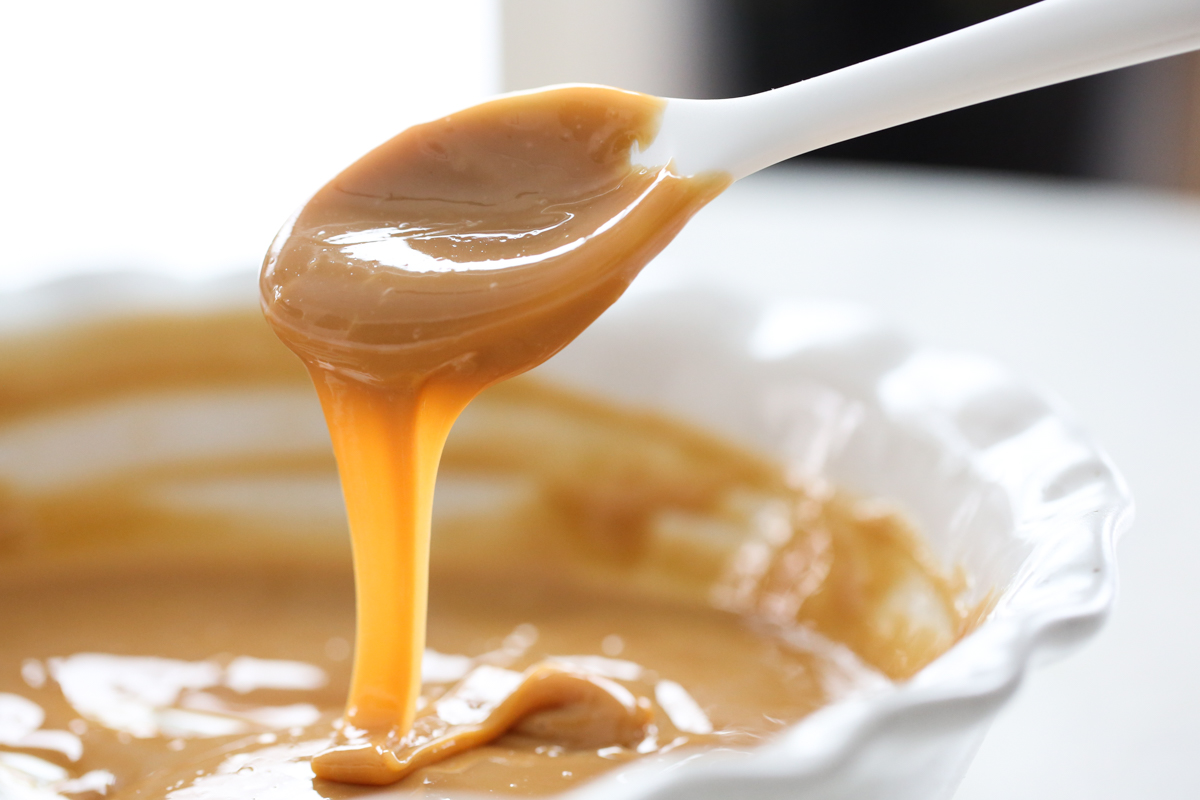
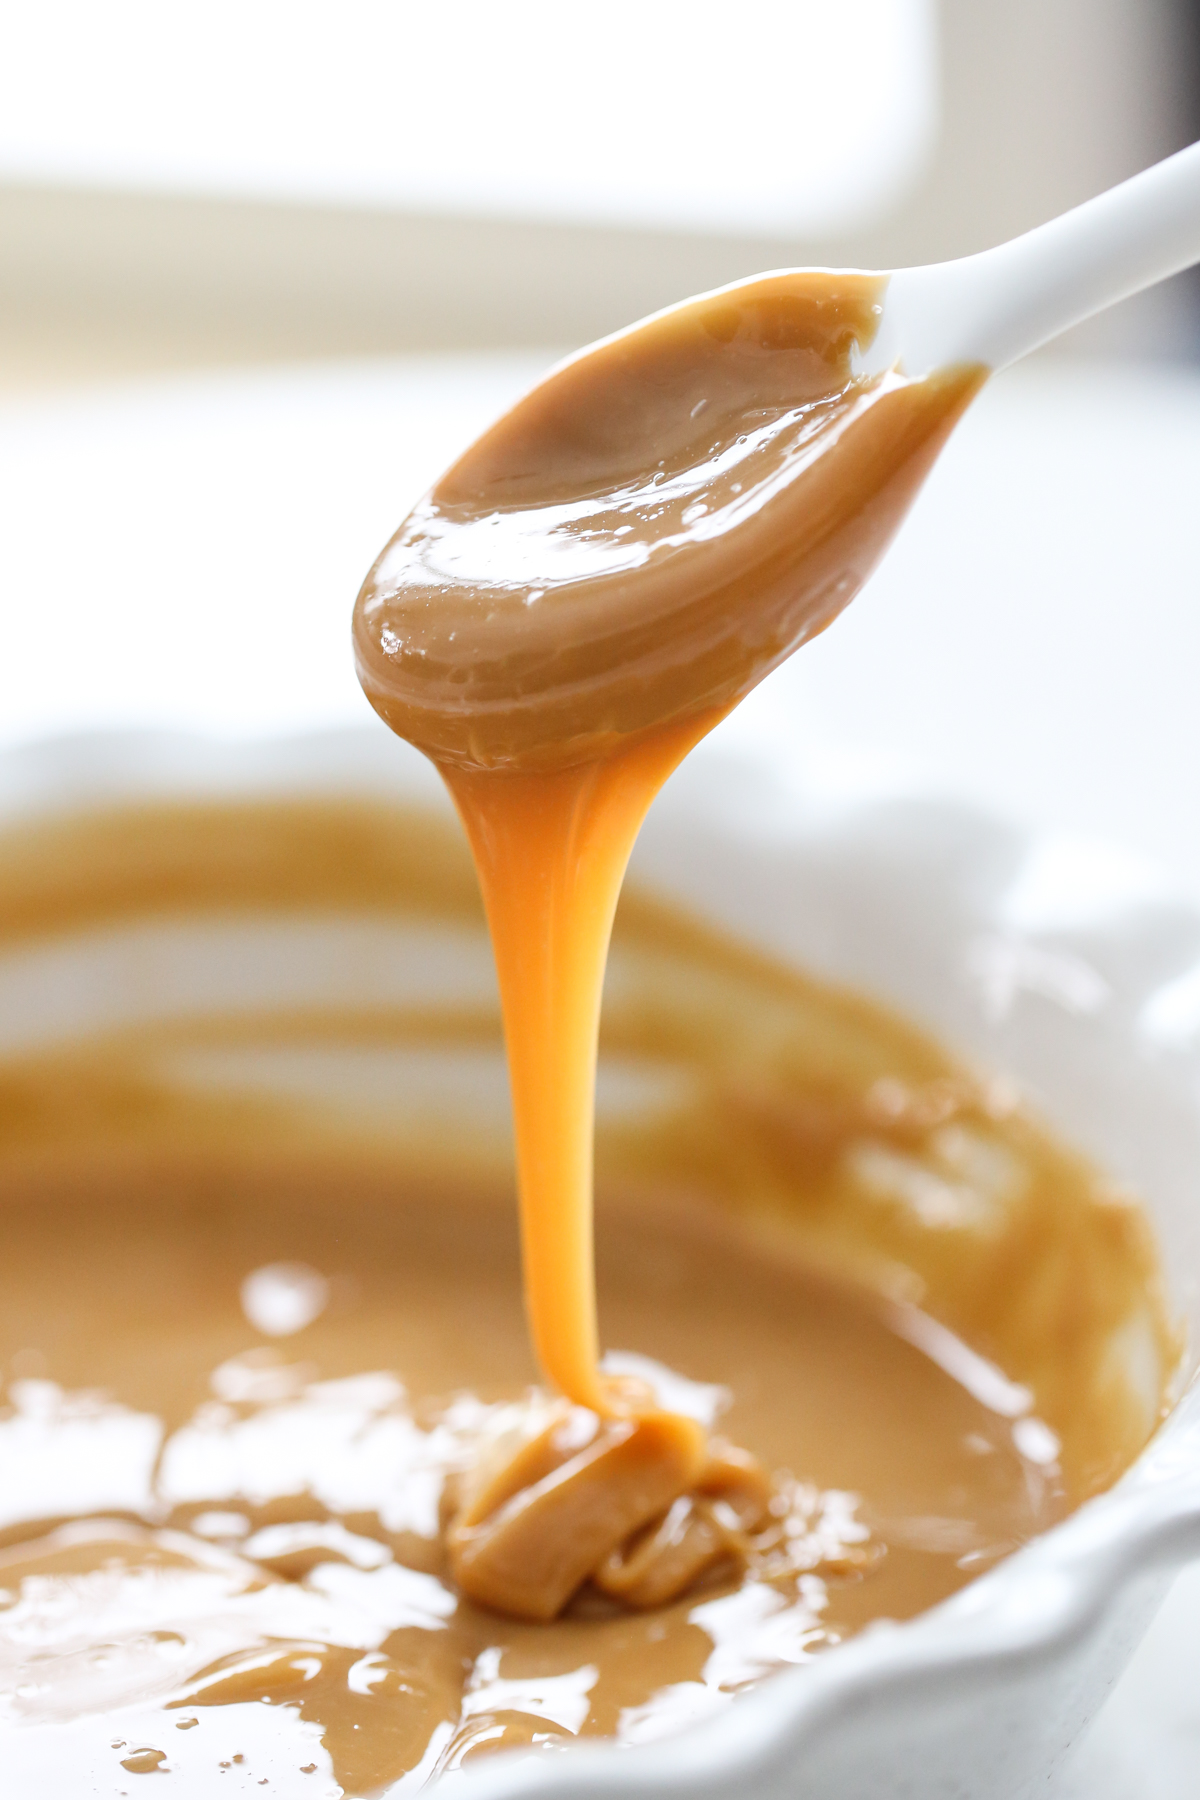
- Bake for one hour and then peek at at it. It will be a light brown at this point. It’s delicious from here on out. The longer you cook, the darker, and thicker it will be. I like to bake at least 1 1/2 hours. This is a great consistency for drizzling with a mild flavor. Continue cooking longer for a deeper flavor and thicker texture. I would cook longer (more like 2-2 1/2 hours) if I wanted to spread the dulce de leche in between cake layers or spread onto cookies.
- The longer you bake, the more water that evaporates. I like to keep a hot tea kettle ready so I can refill the water if necessary.
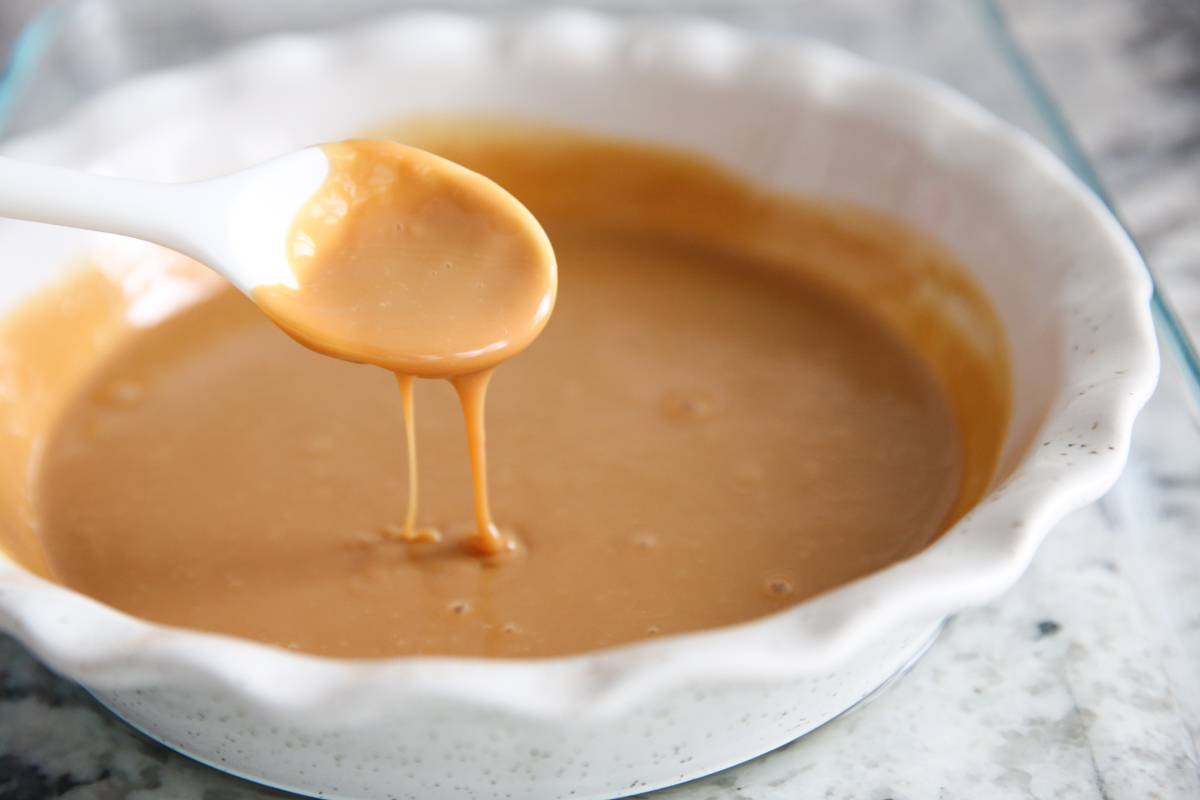
- When done, remove from oven and use a whisk to smooth out mixture. It will be lumpy at first, that’s normal! Whisk it till smooth, as it cools it will thicken more.
How to Store Dulce de Leche
When not using, store in an airtight container in the fridge. Caramel will thicken once chilled. You can leave at room temp to soften a bit or gently warm and stir until smooth.
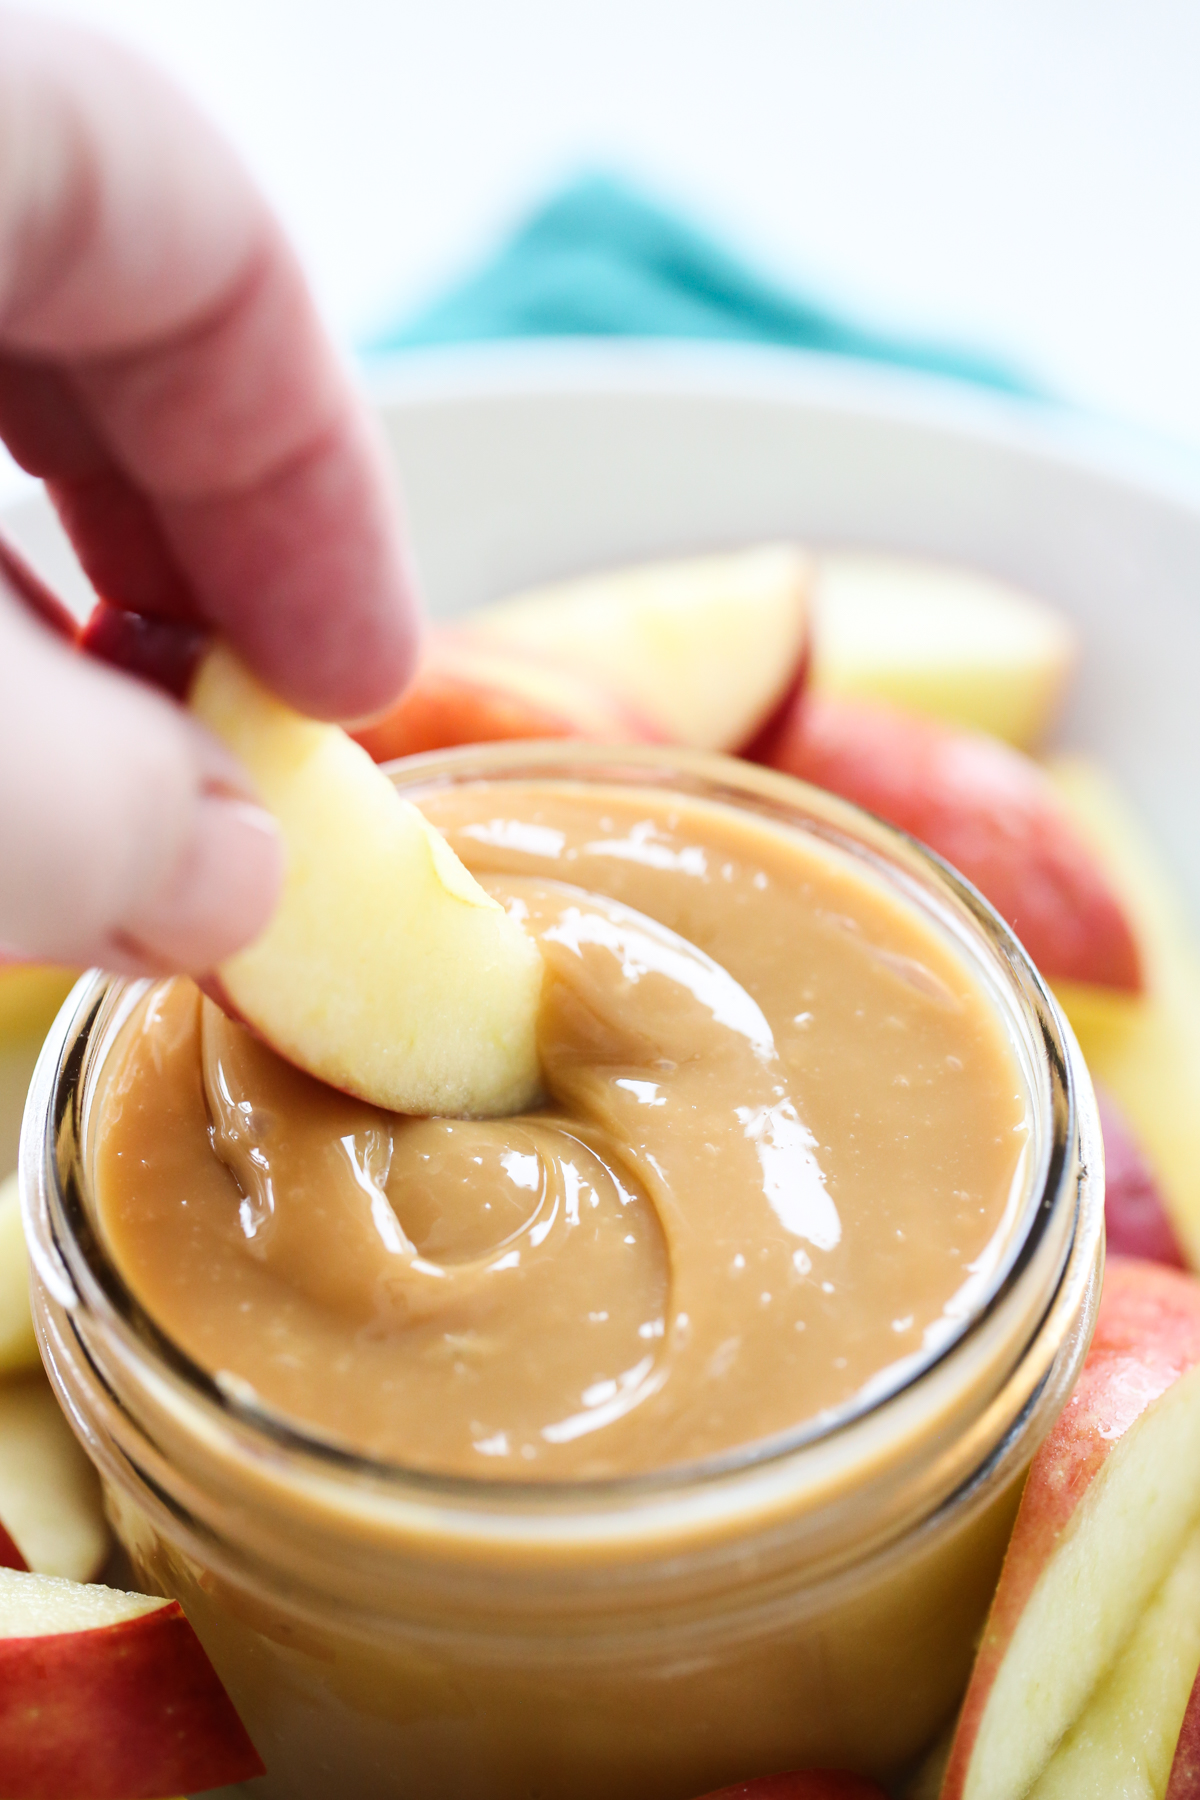
Serving Suggestions
- Spread on cookies or crackers
- Use to fill cupcakes or spread in between cake layers
- Drizzle over cheesecake
- Serve with ice cream
- Pour over waffles, pancakes, baked French Toast
- Roll up in a crepe
Did You Make This?
I’d love to hear from you! Snap a picture and tag me on Instagram, then come back and give this recipe a rating!
Print
Homemade Dulce de Leche
Description
This thick, spreadable caramel is a staple in Latin-American kitchens and incredibly simple to make at home. It requires only one ingredient! Perfect for drizzling over desserts like ice cream or cheesecake, or spreading onto cakes, cupcakes, or cookies.
Ingredients
1 can sweetened condensed milk
Instructions
- Preheat oven to 425 degrees.
- Pour sweetened condensed milk into a shallow baking dish, such as a pie plate or loaf pan.
- Cover very tightly with foil making sure all sides are covered and sealed. Place baking dish in a larger pan, such as a roasting pan or cake pan and place in oven.
- Fill larger pan with hot water until water level reaches about half way up the outside of the covered baking dish.
- Cook for about 60-90 minutes and then carefully check. Color should be a light caramel brown.
- Continue cooking if necessary, checking every 15-30 minutes. The longer you cook, the darker and thicker it becomes.
- Remove from oven and whisk mixture until smooth.
- Store in fridge.


Questions & Reviews
How do you do it in a pressure cooker?
And on a side note, do you have any other pressure cooker recipes? I just got an electric one for my birthday.
The method for cooking it in a pan of boiling water is the one I've always used. We put 3 cans and submerge them in the water, making sure the water never gets to the can. About 3 hours later, I have 3 cans. Then I use a graham cracker crust and pour each can into the pie dish. It's called Caramel Pie and is AWESOME!!!! I do love your idea of doing it in the oven. I've never had a can pop myself but have wondered about it, LOL. I've never even had one bulge out.
Looks amazing – and I'm still in shock that it only has one ingredient! I love the ice cream and brownies idea someone posted. Perhaps this weekend I'll have an extra treat!
I usually do the scary boiling the closed can method b/c I can store the finished cans in the cupboard until I'm ready to use them. But the fastest way is in the microwave: Place the sweetened condensed milk in a large microwaveable bowl and cook on medium power for about 4 minutes, stirring halfway through cooking time. Reduce the powder to medium-low and continue to cook for another 8 to 12 minutes, or until the milk has thickened and has turned a light caramel color. Remove from microwave and beat until smooth.
I've done this before but used 2 cans. I poured them into an 8.5 x 11 casserole dish, covered it with foil, set it inside a 9 x 11 dish and water bath. After cooking, poured into pie crust/plate, and wa-lah—caramel pie! Top with whipped cream and crushed Heath Bar. Everyone will think you have slaved for hours!
I love love LOVE when you do Brazilian things! I miss it so much (I have been home for …5 1/2 years). Keep 'em coming!
Yum. Yum. Yum! I'm going to have to try this!
Is there a risk of the can exploding (like it can on the stovetop) if I do it in the crockpot?
Oh wow. What a coincedense. I made this for my daughter and her friends for her Halloween party. They all stood around the crock pot dipping and eating. It was gone sooo fast. I also put out three dishes of sides to go with it so it was like eating one of those fancy caramel apples. I got mini choc chips, crushed up Heath bar and chopped peanuts. They have other wonderful mini topping in the baking aisle that you can use. Just another way to make wonderful MORE wonderful!
Your website is really starting to tick me off. Everything you post looks so darn fabulous that I have to drop what I'm doing, go to the store, and then immediately make it. If you could please post something that looks simply mediocre, I would really appreciate it.
😉
I've tried this on the stove top! It took about 2-3 hours on low heat….we have cooked it longer (like 4 hours) but it was too thick. Also–make sure you let the water COMPLETELY cool to room temp before removing the can from the water……..
I started reading this and thought, "nuts, I'd like to not have to buy the can stuff anymore, but this needs a can." And then I continued reading. WHOA, I CAN use homemade "sweetened condensed milk"!
Just make up the milk and use your method to make the creme de leche.
YEAH! Thanks for posting this!
That sounds wonderful! I have a question though- how do you SAY dulce de leche???
Now your way I will try, especially in the crock-pot, tfs!
I had to laugh at this. I used to live with my aunt for a few years and her boyfriend was from Belize. He always did the simmer thing with the sweetened condensed milk on the stove top – at least once a week. One day, while my aunt was on vacation, he was doing this on the stove top and would come to check on it every once in a while. Well, he was also outside working on his car. I was in my bedroom and heard this huge explosion. We both came running into the kitchen from different directions and there was nothing but sticky pudding all over the ceiling, the walls, everywhere. Looked like something from the movies. I started laughing so hard! And of course, left him to clean up his mess.
I had the same thing happen a huge mess and a hole in the ceiling. Forgot to check the water I was distracted .haha
I was just at Walmart and actually saw that they had a can of Dulce de leche condensed milk and I thought " I wonder what you do with that?" Now that I know how to make and use it, I better try it! thanks!
My husband will love this. I'm thinking French toast with Dulce de leche for his birthday breakfast tomorrow.
We add a nice sprinkle of Kosher salt to the top for a sweet/salty twist! Love this on fresh fruit.
Boil the can for 30 mins on the stove and you get the same thing!
I am making different kinds of homemade ice cream toppings as part of our Christmas goodie basket gifts. Do you have a method of how to do this in my own jars and have them successfully seal? Can I just put sweetened condensed milk in my jars and pressure cook them?
You will get the same result if you boil the can. Super easy!!
This is wonderful! I live in Costa Rica and also enjoy dulce de leche very much (this kind more than the canned kind), but I don't have a pressure cooker… this is the perfect answer!
Oh my word ….
in the crockpot? really?
I can't wait to try this!!!!!
my mouth is truly drooling now…. yuuummmm
I've done it on the stovetop, too. The annoying part about that is that you have to keep checking to make sure the cans are still covered by an inch of water so they don't explode. I can't wait to try the crockpot method.
I did the cans in water last Christmas and made cute little scrapbook paper labels for them. I gave them to the neighbors as part of our goodie basket. I do have to admit that I wouldn't let ANYONE in the kitchen while they were simmering. Chicken, that's me.
Steph
I've done this before and it works PERFECTLY! The dulce de leche is absolutely divine!! Great tip to share.
I've heard of doing this before but only the simmering the closed can method…and frankly I'm a little to chicken to try that! I envision having to dodge cans of exploding condensed milk! Now that I know there's a safe method that won't give me nightmares I'll have to give it a try. I'm thinking brownies with ice cream smothered in dulce de leche sounds so good.
THAT'S IT??? Oh wow…….you can't get any easier than that!!! Thank you!
I really am almost in shock that it is only one ingredient and it's so easy to make… I <3 <3 <3 Dulce de leche but have a friend who always makes it for me when ever I want! Im trying it this weekend!
I love your Brazilian inspired recipes! Especially since you "americanize" them so that it's easier to do it here… I've always been scared to making doce de leite in the pressure cooker… but I'll have to try it like this! It's also perfect mixed with a can of creme de leite (media crema) and some walnuts… we call it Stogonofe de Nozes and it's a classic christmas dessert in Brazil – and it's sooooooo good!