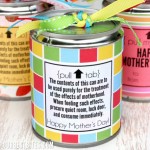
So on that note- I’m always trying to think of fun ways to supply Mother’s with much needed goodies on Mother’s Day because every Mom needs a secret stash right?? I’d made these tin can treats before at a church craft night and completely forgotten about them until my sister was talking about them recently. They’re so fun- I’m going to show you how to customize a tin can and fill it with goodies or trinkets of your choice for the recipient to crack open. (**And since so many of you expressed interest in making these for Teacher Appreciation Week, I’ve made up some tags for that as well, see links at the end of this post!**)
Supplies Needed:
canned fruit with tab tops, suggested size 7-8oz
candies for filling
tissue paper
hot glue gun
decorative paper
ribbon
side can opener or safety can opener (optional)
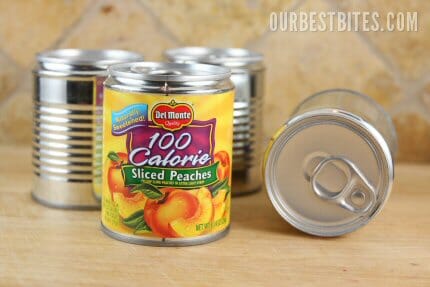
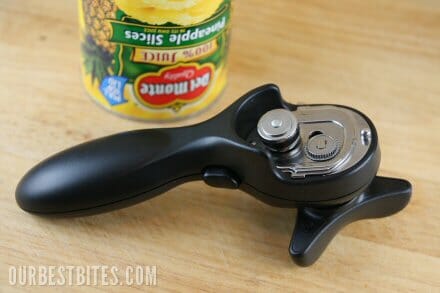
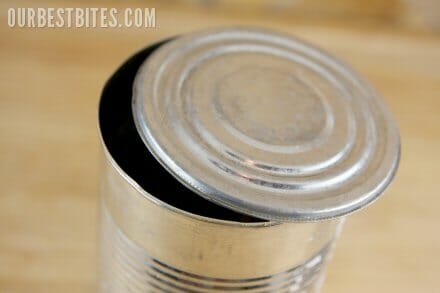
Step one: Remove labels from cans. Use a can opener to remove the bottom end of the can. It’s the side without the tab top folks! A side can opener works great here because you won’t have the sharp edges and the pieces will be a breeze to glue back together. If you plan ahead, you can eat the fruit along the way in your normal meals. If you plan at the last minute like me, you can dump it all in your blender, blend it up, freeze it in ice cube trays, and use for smoothies. Or it’s great poured right into Popsicle molds.

If you use this type of can opener, your life will be much easier:
My coping mechanism of choice:
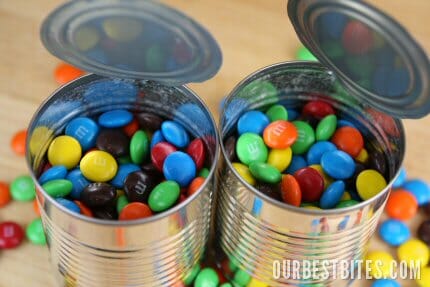
Leave about 1/2 inch of head-space at the top of the can. Another reason I use small cans is because you need quite a bit of candy to fill these if you’re using something small like M&M’s. But you could use little wrapped chocolates or candy bars or whatever.
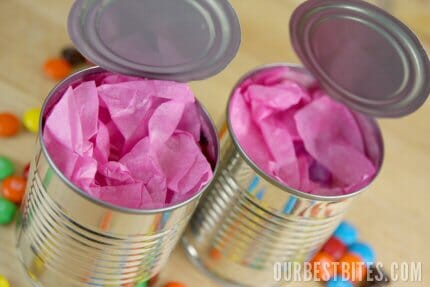
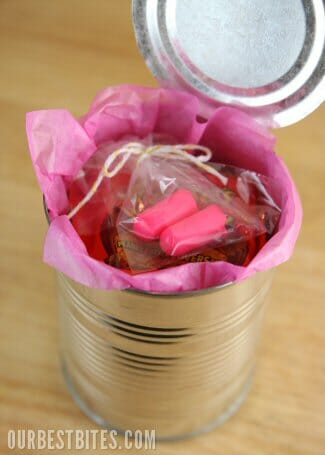
Step 3: Fill the empty space with a little tissue paper. This is important and you’ll see why in the next step.
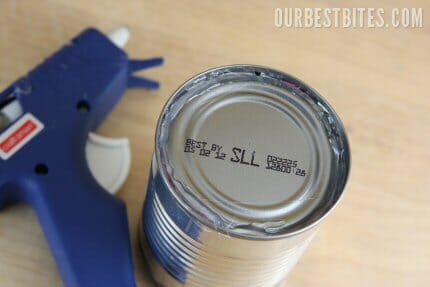
Step 4: Use hot glue to reattach the bottom of the can. If you use the safety can opener, this part is simple, and it takes very little glue. If you use a traditional can opener, like I did in these photos, it isn’t hard, but it’s a little tricky. I find it easiest to bend the lid back down flat and then fill in the open space with glue. This is why the tissue paper is there- to catch the glue that goes through so it doesn’t end up stuck to the treats.
Now. I consider myself to be relatively handy with a glue gun, and fairly crafty, and I have never managed to glue the lid on without it looking like a complete mess. The good news is that it doesn’t matter even if it’s ugly like mine because once you see how cute the finished product is, you’ll understand why no one will be looking at the bottom! So just leave the can sitting like this until the glue is dry.
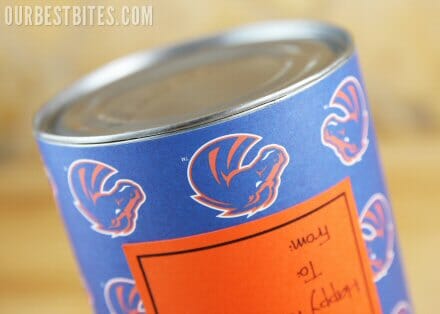
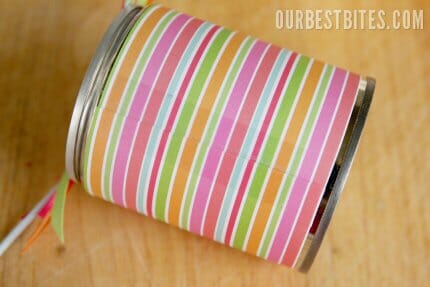
Step 5: Cut a piece of decorative paper the same height as the can. Wrap it around and attach with tape, double-sided tape, or a glue stick.
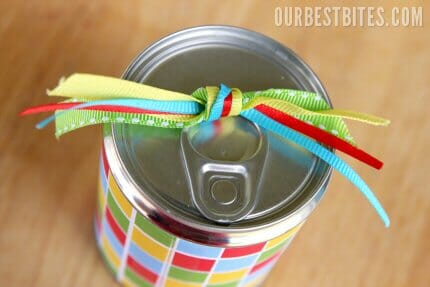
Step 6: Tie a few matching ribbons on the tab.
At this point you’re ready to go! These cute cans are ready for giving, and people will be SO surprised when they open up the fresh can and find goodies inside!
But.
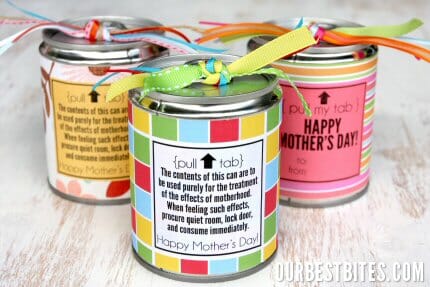
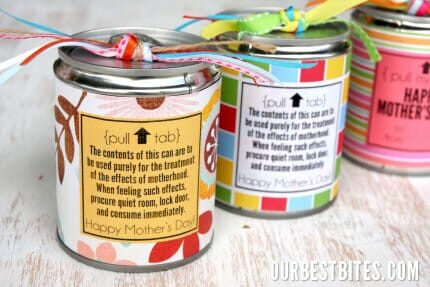
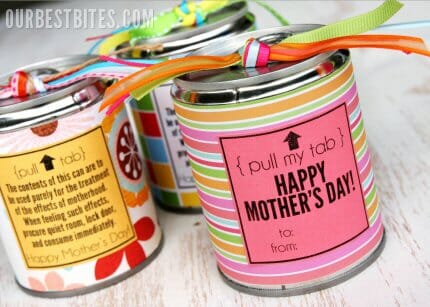
In honor of Mother’s Day I thought it would be more fun to put this on the front:

get the download at the end of this post!
How fun are these??
You can print the labels out on colored paper to match your theme
And if you don’t feel like being silly, I also made a generic “Pull my tab” label suitable for any lovely lady in your life!
Now go get creative! You can really put anything in a can- how about this one with a small un-scented candle (so it doesn’t scent your candies!), a Reeces PB Cup and a set of ear plugs? My kind of survival gear.
I have some really fun variations for all kinds of holidays and events- but we’ll focus on one day at a time!
Tin Can Treats
Tutorial by Our Best Bites
Supplies:
canned fruit with tab tops, suggested size 7-8oz
candies for filling
tissue paper
hot glue gun
decorative paper
ribbon
1. Use a can opener to remove bottom (non-tab top side) of can, but leave it attached at one point.
2. Wash cans thoroughly and dry completely.
3. Fill with candies/treats/trinkets, leaving about 1/2 inch space at top.
4. Fill remaining space with tissue paper.
5. Use glue gun to secure lid back to can and let dry completely.
6. Measure a strip of decorative paper the same height as can. Wrap around the can and secure with tape or glue.
7. Tie decorative ribbons through the tab on top of can.
8. Attach tag if desired.
Download free printable tags here:
Mother’s Day Tin Can Labels: Silly
Mother’s Day Tin Can Labels: Generic
Teacher Appreciation Tags
Also we have
Christmas Edition
Father’s Day Edition
Valentine’s Day Edition (coming soon)



Questions & Reviews
I’m thinking this would be so cute as a party favor for my 1 yr. old’s baseball birthday party! Baseball scrapbook paper, baseball ribbon, and a cute little baseball saying, oh the ideas are coming now! Thanks so much for such a cute idea!
I put some wrapped candies and rolled up dollar bills for my nieces & nephews for birthday and Christmas. I left the orginal wrappers on the cans.
I’ve put giftcards in the larger cans this same way. I love the idea of candy in a small one–definitely a good treat to have on hand!!
If you or someone you know has a smooth-edge can opener, you can use that to open the bottom of the can. Then all you have to use is a small bead of super glue to re-attach it. Much easier than the glue gun (but I realize that not everyone has one of those can openers of course). Great idea for a darling mother’s day gift!! Keep em coming!
Recently became a BIG fan of your site. Love EVERYTHING! My father (who I cook for, a meat and potatoes kind of guy) has threatened to block this site on our router because I have cooked almost solely from it, so thank you for providing such awesomeness!
Anyway I love this idea! Love the idea of a special candy stash because as a stay at home mother of 4 boys myself, I need my candy stash on a regular basis. I think I will def be making these for all the moms in our neighborhood. Ear plugs are a great idea too! Keep the amazing ideas coming!
How darling! What a great idea.
I saw this idea last fall and made them for my Daycare kids for Christmas. I filled them with bouncy balls, a small notebook, small jar of bubbles, rubber bracelets, and a gold medal necklace that said ‘I am #1’. I use the Campbells Chunky soup can–it’s a little bigger! The kids loved them and I thought it was such a cute idea–I have made them each one for their Birthdays this year, filling them with a 3 foot long Happy Birthday Balloon, necklaces, parachute men, Birthday Blowers, and anything else I can find that is inexpensive! GREAT idea!!! Also–instead of opening the can with a regular opener, I use one that cuts around the rim. I put a little Elmer’s Glue around the edge when I am ready to seal it back up, and put a weight on it to hold it in place until the glue dries. No messy hot glue ring and it works great!! :o)
Perfect! I’ve been looking for something neat to do and gave up just yesterday. Can’t wait to do these!
LOVE the ear plugs! What a great and cute idea!
these are so cute, and I love that there are limitless options for what goes inside! I would love it if I was given one of these, so I can’t wait to make some and make somebody’s day!
That’s adorable!
How fun!! Can’t wait to make these!
Here’s a link to a tutorial that I’ve used a few times. Eliminates the need for tissue paper. http://www.splitcoaststampers.com/resources/tutorials/pop_top_can/
Um, seriously, can I be you when I grow up?
I love this idea!
OMh! I LOVE LOVE LOVE LOVE this! I can’t wait to give it a try!
Such a cute idea! Next week is Teacher Appreciation Week – have you ever thought of making a label for a teacher? I may try it, but I know my label will not be nearly as cute as yours! Did you use photoshop to make them?
haha! Cute idea, Sara! 😉
you have the dates listed for your Idaho visits, however I thought I heard you were coming to deseret book in idaho falls. If so, what date?
love your site!
Kathy, we don’t have a date/time yet, and it may be in Rexburg (we’ll be in Rexburg speaking at the BYUI Business Forum). But we’ll let y’all know as soon as we know something! 🙂
I’m having a Girls Night tonight with my friends… We are learning to make those cute girly hair bows and I thought I would pick up some supplies for these too and show them how it’s done! Thanks for sharing your great ideas!!! =)
Super cute. I am going to do these for teacher appreciation week next week. Just wish you had a super cute label all ready for that (hint hint:) I did a similar project for April Fool’s for my daughter’s lunch box but left the label as is to fool her:-) The pampered chef can opener works fabulous for this project. Makes the gluing much simpler!!
Oh my gosh! These are adorable!
Genius! Can’t wait to make ’em!
What a cute idea – you always amaze me!
If you use the side open can openers it is a lot easier to put the lid back on and look pretty good.
Love it! What a cute idea! The wheels in my head are turning with other things/holidays to use this fun gift idea.
LOVE it times a thousand! 🙂 What a fun and crafty idea. This is sure to make anyone’s day. How fun would it be to make these for a Birthday Party, Bridal/Baby Shower (with coordinating M&M colors!).
You guys rock. I’ve recently found your blog and am fascinated every time I pop on here 🙂
LOVE!!! Very cute idea! What a fun idea for lots of different applications.
This idea is so cute! I agree with a previous comment, from experience it is much easier to use the can opener that takes off the entire lid with no rough edges. It glues back on seamlessly! 🙂
Awesome idea! These would make great teacher gifts espically for Teacher Appreciation week next week!
I just ordered 3 of your books for Mother’s Day gifts: one for my mom, one for my mother-in-law, and one for me. (Since I’m a mother, too, it was only right!) 🙂 Love your recipes and website, and I’m so glad you made gifts easy for me this year. Thanks!